Prototype with Sensors in ProtoPie
Learn how to build prototypes with sensors without a line of code.

As new smart devices are released every year or even every quarter, there is greater importance in designing a user experience on a brand-new device. Smart devices are becoming smarter by the generation, and there are attempts by manufacturers and service providers to figure out the needs of users even before the user makes an input. Google Now is a good example of such a system, as it gathers information about a user’s activities and location and presents context-aware information.
In order to provide context-aware information, there are three ways to gain the context information relevant to the user.
- Direct user input
- Previous service usage records
- Analysis of indirect information
Information gathered through sensors plays a major role in indirectly analyzing the context of users without any direct user input. Sensors are already integrated in the smartphones people carry on them, and they are sometimes located on the outside of the smartphone like beacons, conveying information to smartphones. These sensors can pick up current location, motion information, speed of movement, surrounding noise level, coordinates of the smartphone in space, and other forms of information. So how can all this information be processed and used for services or products? This question is not only an interesting adventure for designers, but also a question that is becoming more and more difficult to answer by the day.
Prototyping is gaining popularity as prototyping helps determine the effective value and feasibility of a concept before development and reduces development costs, and there is a growing demand for prototyping that incorporates sensors.
A smartphone’s sensors
Apple’s iPhone 6s has the following sensors, and smartphones of other manufacturers have similar sensors:
- Touch ID fingerprint sensor: authenticates via fingerprint recognition
- Barometer: measures air pressure
- Gyroscope: measures the degree and direction of a smartphone’s tilt
- Accelerometer: measures the acceleration of a smartphone
- Proximity sensor: checks for objects that are covering a smartphone, and the distance between the smartphone and such an object
- Ambient light sensor: measures the brightness of the surrounding environment
- Compass / Magnetometer: shows the direction of orientation
Apple’s iPhone 6s and iPhone 6s+ use the 3D Touch sensor which measures the pressure of physical input on the touchscreen. Huawei utilizes what calls Knuckle Touch which differentiates inputs made with a fingertip and inputs made with a knuckle.
Sensor prototyping with ProtoPie
In order to use sensors, signals gathered by sensors need to be converted into a form recognizable by a prototyping tool. There are ways to achieve this by using tools like Arduino, Raspberry Pi, or Framer with JSON, but requires a degree of knowledge of coding.
ProtoPie allows you to easily utilize frequently used sensors. To implement a sensor, select the Sensor Trigger out of the different types of Triggers. Set the range of values to be accepted by the sensor and map the desired interactions. Voila!
Select the Sensor Trigger out of different types of Triggers.
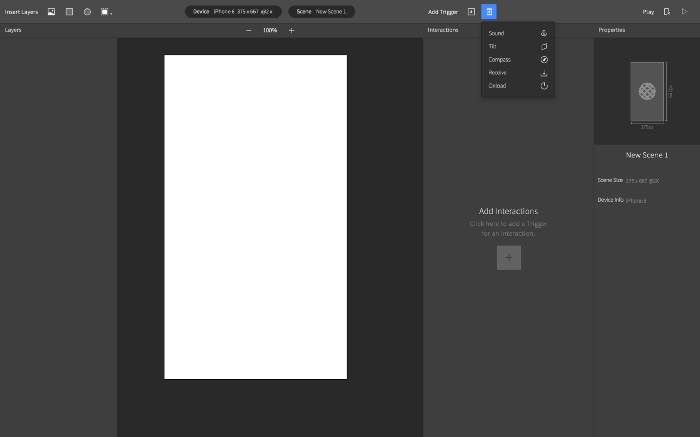
(Interactions in ProtoPie are made up of three basic elements: Triggers, Responses, Objects. For more information, refer to the this post.)
Sound
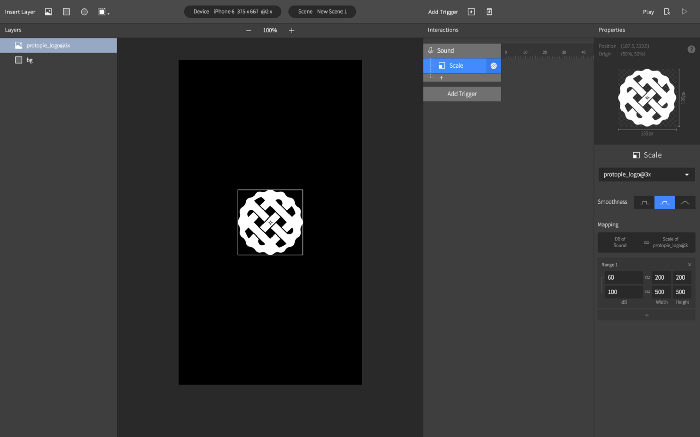
Prototypes made in ProtoPie are capable of changing the properties in layers based on the loudness of sound picked up by a microphone. All you need to do is to set minimum and maximum values for loudness and match the Response with the changes in a layer’s properties.
Tilt
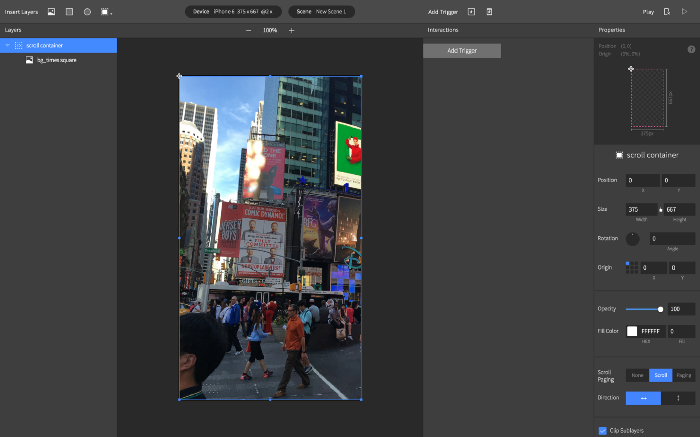
Import an image that is horizontally long, and create a Scroll Container that allows horizontal scrolling. Set the size of the Scroll Container to be the same as that of the device, and drag the imported image into the Scroll Container, turning it into a sublayer.
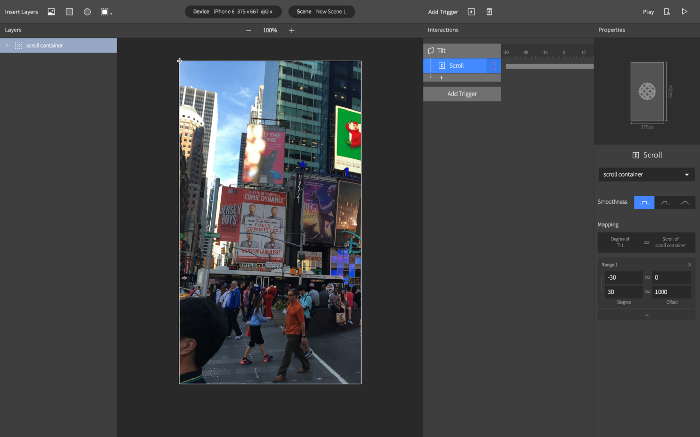
Select the Tilt trigger and select the Y-axis. Add a Scroll Response under the Tilt Trigger and set a value for how much the image will scroll whenever the smartphone is tilted to the left or the right.
Using tilting can result in even more fun prototypes. The following is a dumbbell exercise app showcased during the ProtoPie Launching Party by Joon-won Lee.
Compass
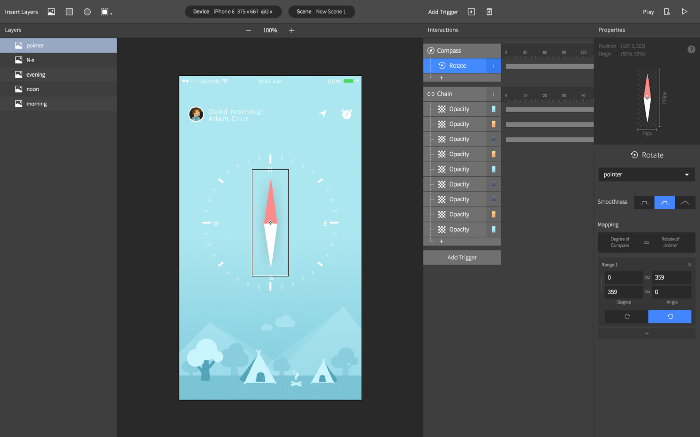
Add a Compass Trigger the same way other sensor Triggers were added. Link a Rotate Response to the Compass Trigger to generate rotation based on the direction of the magnetic field, and input the values as seen in the following screenshot to easily create a digital compass. This example was made by Jailene Liu.
Interactions across devices (Send & Receive)
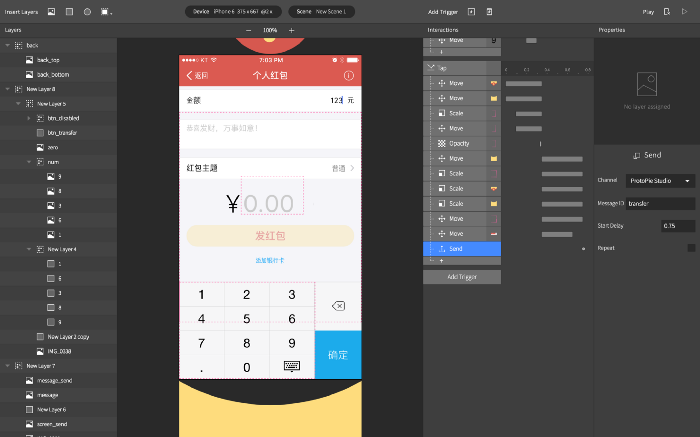
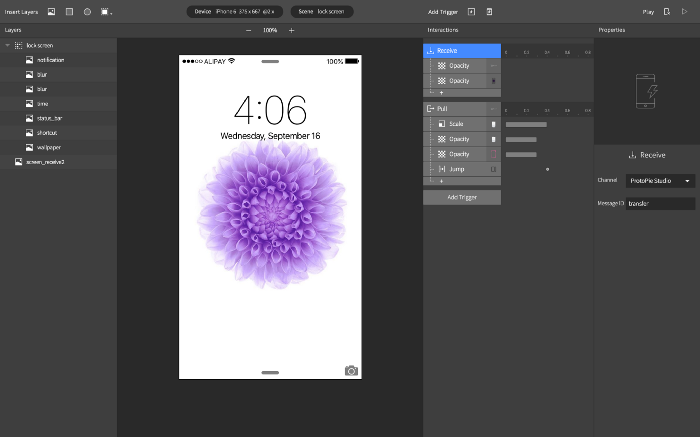
It is possible to create a prototype with ProtoPie that is capable of communicating among multiple devices. With a Send Response and a Receive Trigger, it is possible to send and receive preset messages, establishing a link among devices. The following screenshot shows how to transmit the word “transfer” as a string via the Send Response when a button is tapped on one smartphone. The Receive Trigger on the receiving smartphone will activate the Responses linked to the Trigger when the smartphone receives the word.
3D Touch
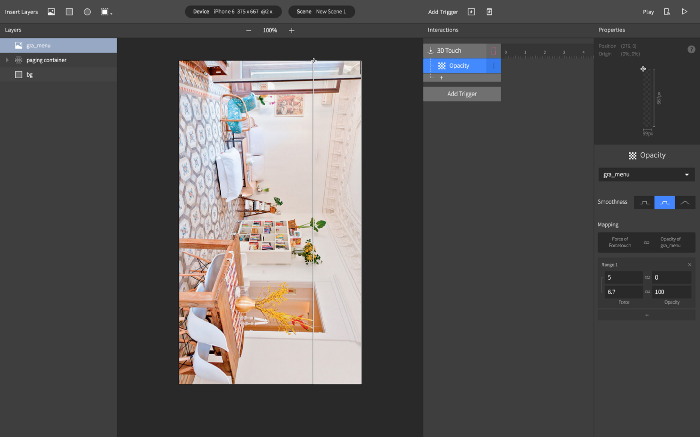
ProtoPie supports 3D Touch, a feature found on Apple’s iPhone 6s and iPhone 6s+. 3D Touch utilizes sensors, but 3D Touch is categorized as a Touch Interaction and can be linked to a Touch Screen Trigger. 3D Touch is capable of detecting pressure levels from 0 to 7, and it is recommended to set the maximum value at 6.7.
What will future interactions look like?
Today, touchscreen-equipped smartphones and tablets and their derivatives are commonly seen and used. However, what about the future? How will the interactions look like? Maybe future interactions will be in the forms of conversations with the likes of Amazon Echo that stay silent in the background, and search for information upon user request. Or maybe future interactions will be based on constant tracking of the user and pre-empting the user with the kind of information a user seeks, even before the user makes a request. As sensors play a growing role in understanding a user, designers will most likely have to learn how to express design ideas while using sensors.
