Designing Automotive In-Car Experiences with ProtoPie
Learn how to use our Automotive Solution to create new in-car automotive experiences using live vehicle data.

The automotive industry is evolving rapidly. 20 years ago, the average car contained 1 million lines of code—these days, this number is around 100 million. The term ‘in-car experience’ now relates just as much to a car’s infotainment system as it does to how it actually feels to drive the vehicle.
In fact, research has even suggested that drivers want their cars to provide the same entertainment and communication features as their smartphones. The takeaway for UX designers is clear: optimizing the in-car experience is now as much a digital endeavor as it is a physical one.
Automotive designers therefore need to use real live vehicle data as an input when designing their in-car experience. This isn't a nice-to-have—it’s a necessity. That’s why we created our Automotive Solution.
How ProtoPie helps automotive companies use live in-vehicle data
Our Automotive Solution allows automotive companies to build and test their prototypes across multiple displays while integrating with any hardware and APIs.
There are a wide variety of potential use cases, and we’re continually impressed and surprised by what our customers have created using our Automotive Solution. One of our German clients recently showed us how they used ProtoPie to test brand new interaction design concepts that were integrated with real cars, and that used real live data from those vehicles.
Unfortunately, due to confidentiality reasons, we’re unable to publicly share this specific use case—but we did the next best thing. I decided to take this challenge on and create a general example that showcases how to test interaction design concepts utilizing actual live data from the car as per the video below.
This demo demonstrates how a digital dashboard prototype receives and uses real data from a car to test the in-car experience that it provides. However, this is just scratching the surface of what’s possible with our Automotive Solution. Every single one of a car’s components is constantly sending and receiving signals—and as someone who doesn’t work in the industry, I had little clue of where to even begin.
But when I did some further research, I came across something called OBD.
What is OBD and how was it used to design and test this in-car experience?
OBD, which stands for On-Board Diagnostics, is a computer-based system that tracks the status of the car’s various vehicle subsystems. It can be used to investigate any issues with the car’s performance, so it’s basically your vehicle’s built-in self-diagnostic system.
I leveraged my car’s OBD to receive live data/signals from my car. There are other OBD systems but OBD2 is the most common one out there for almost all new cars, including mine.
What kind of data can you get from OBD2?
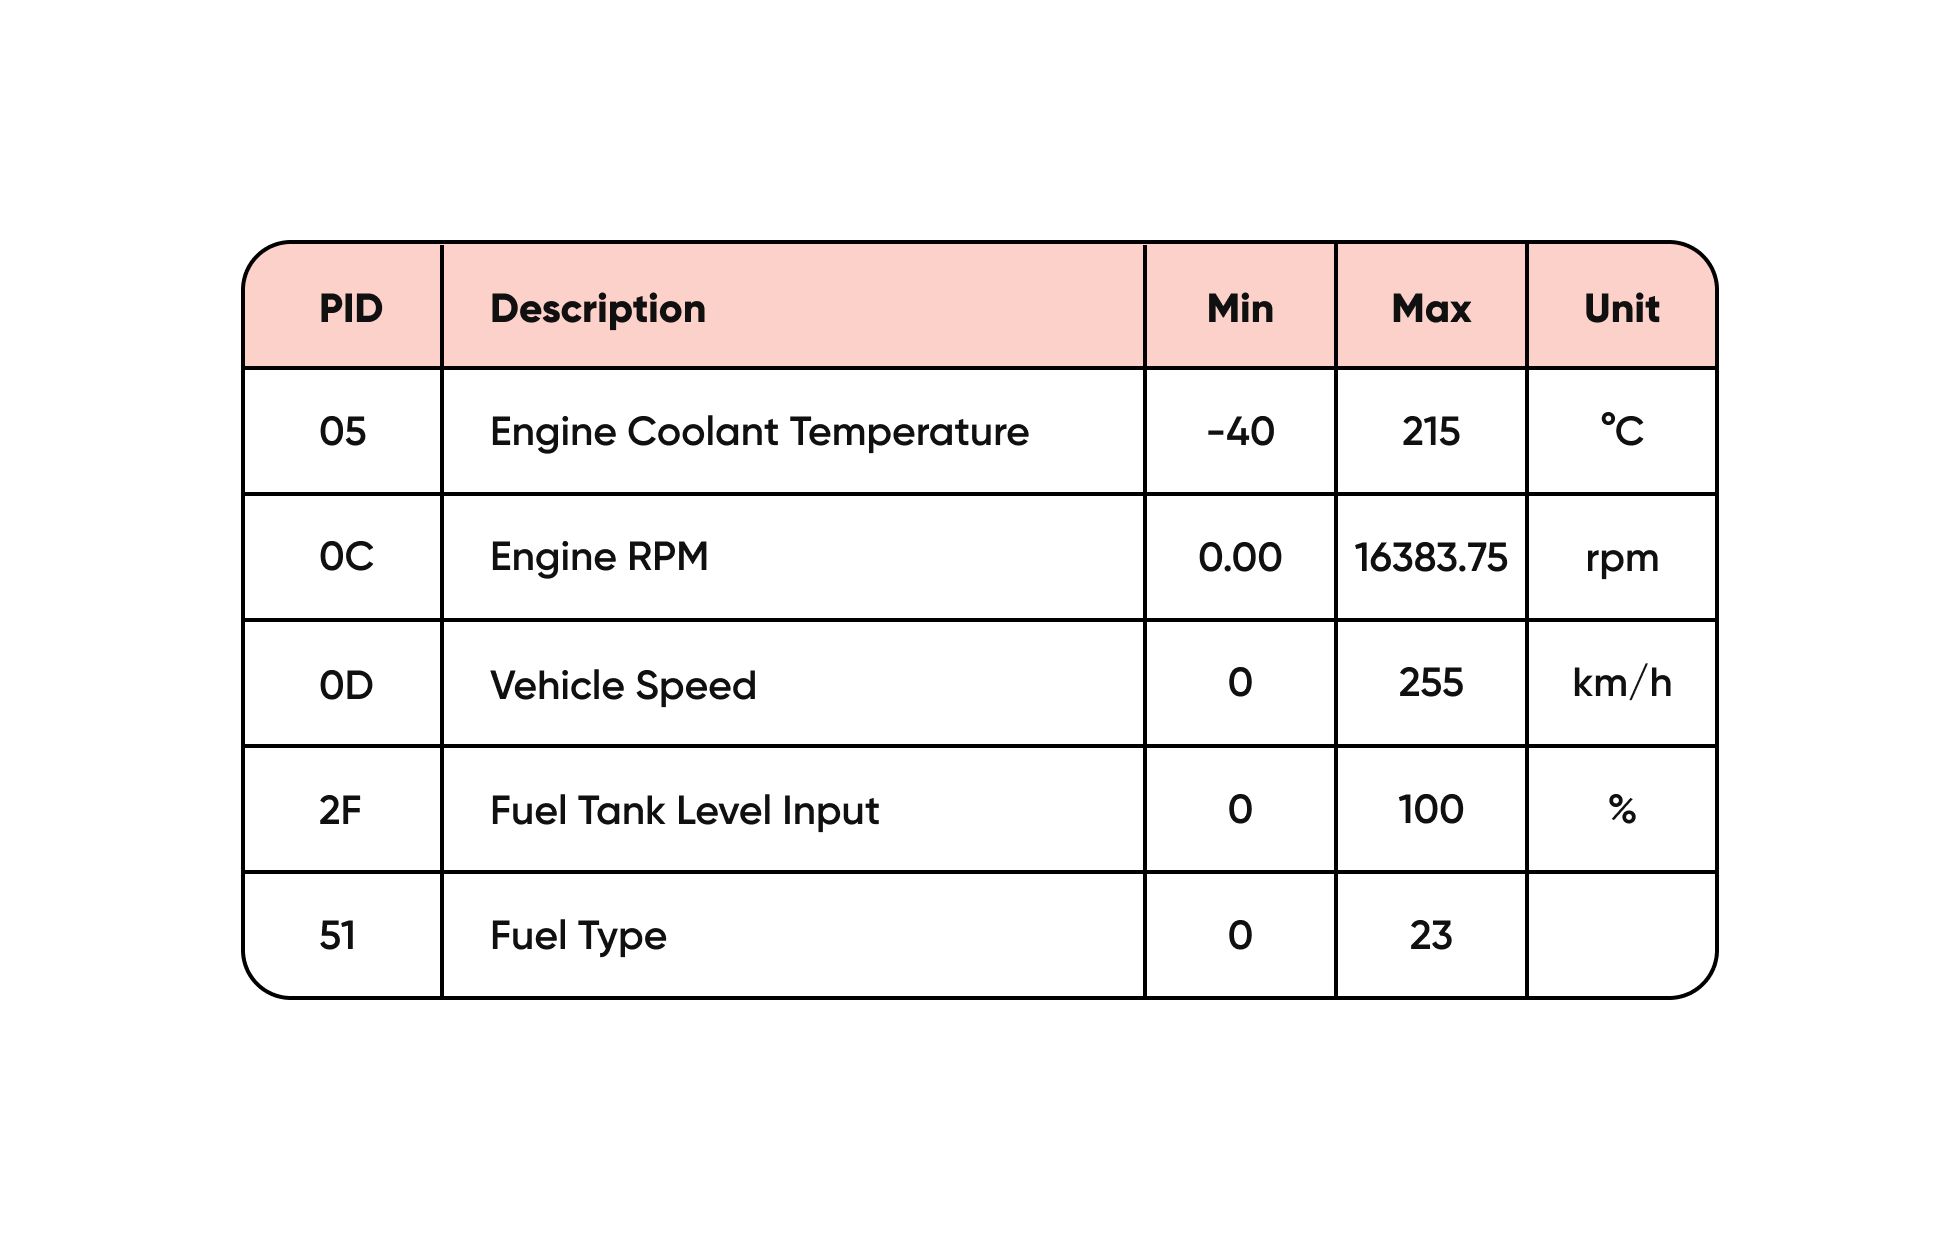
You can find out by simply looking at OBD2 PIDs or On-board diagnostics Parameter IDs—these are basically codes used to request data from a vehicle. Below are some examples, or you can alternatively check out this link if you’re looking for a more comprehensive list.
How do you access the data?
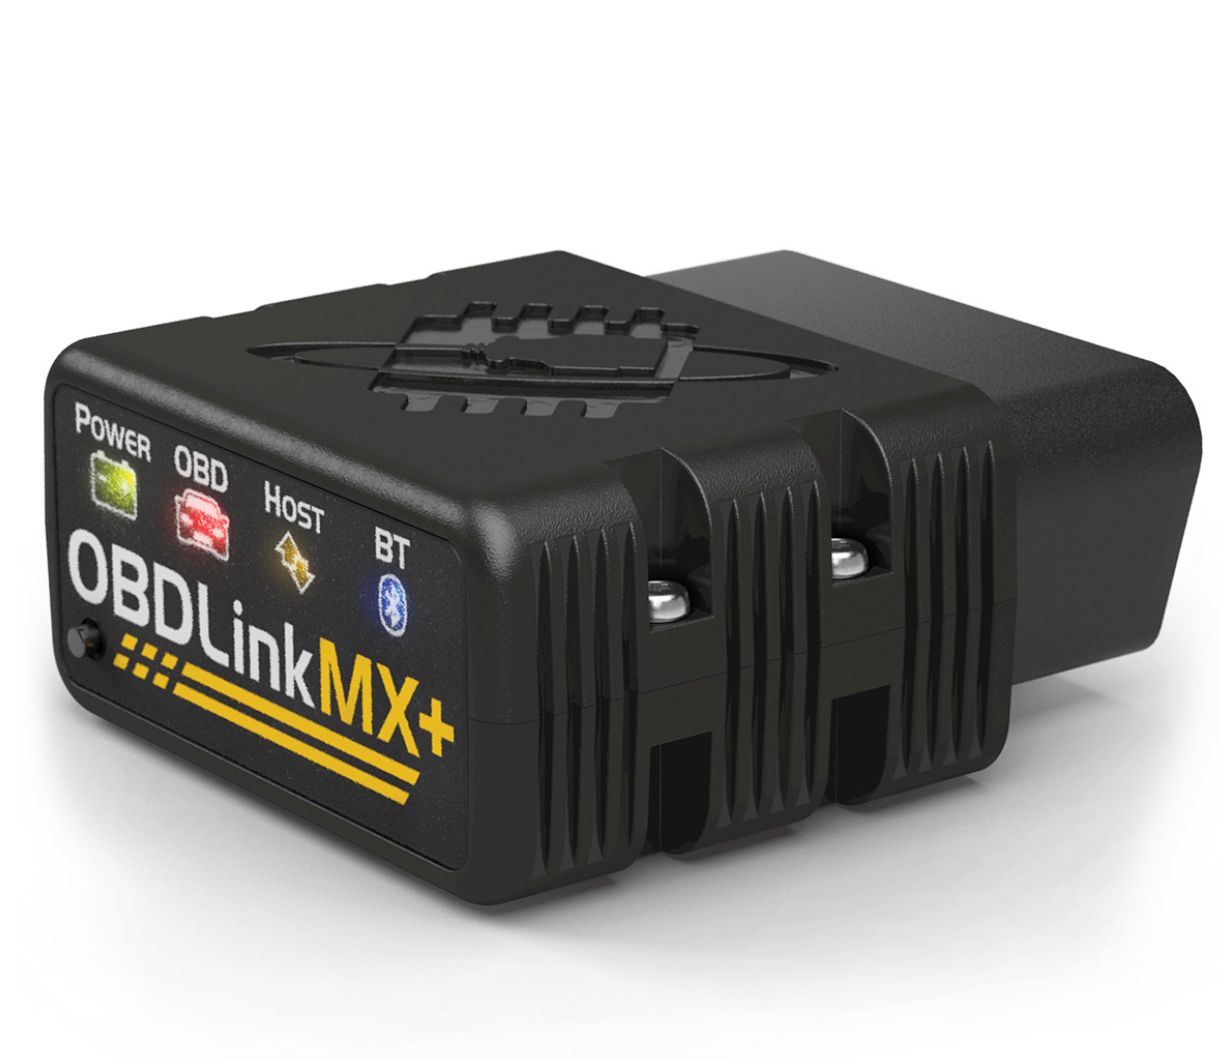
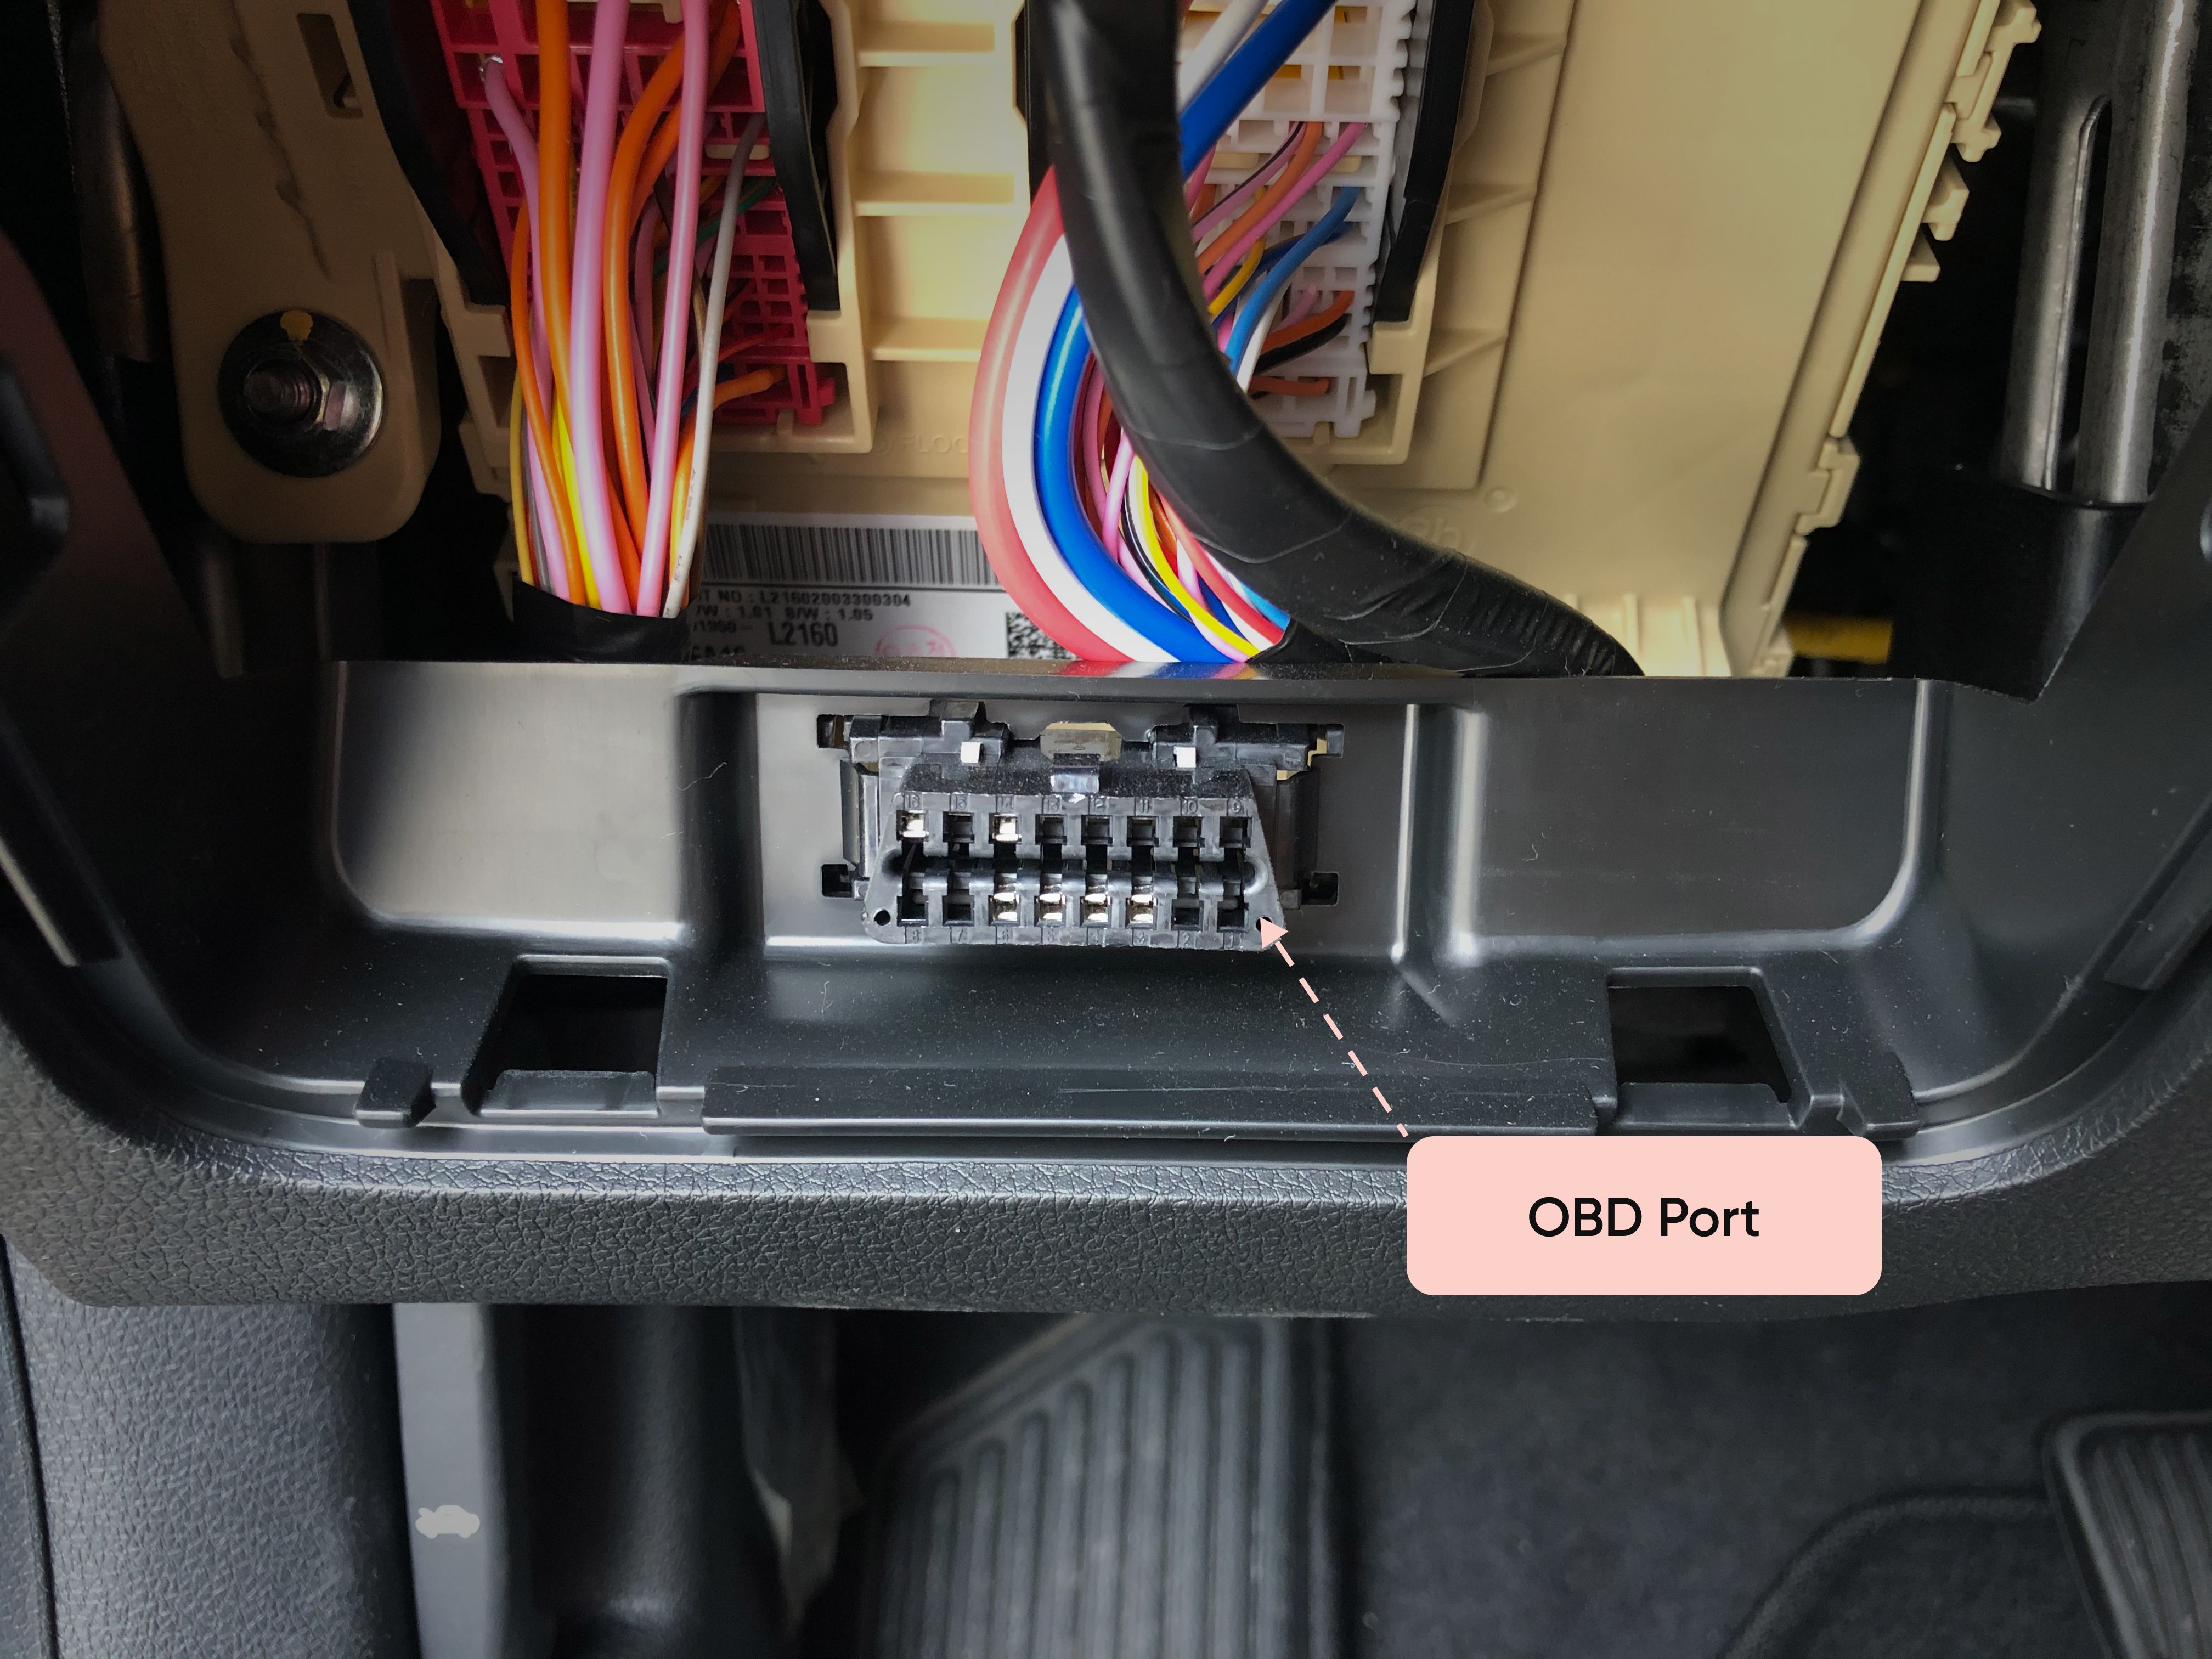
To tap into the OBD data, you first need an OBD scanner. I purchased a Bluetooth OBD scanner named OBDLink MX+ to receive live signals from the car itself. It’s super simple to install—you can just plug the scanner into the OBD2 port. It will then broadcast the signals to your laptop through its Bluetooth connection.
How I tested my designs using the OBD2 and OBD2 scanner data
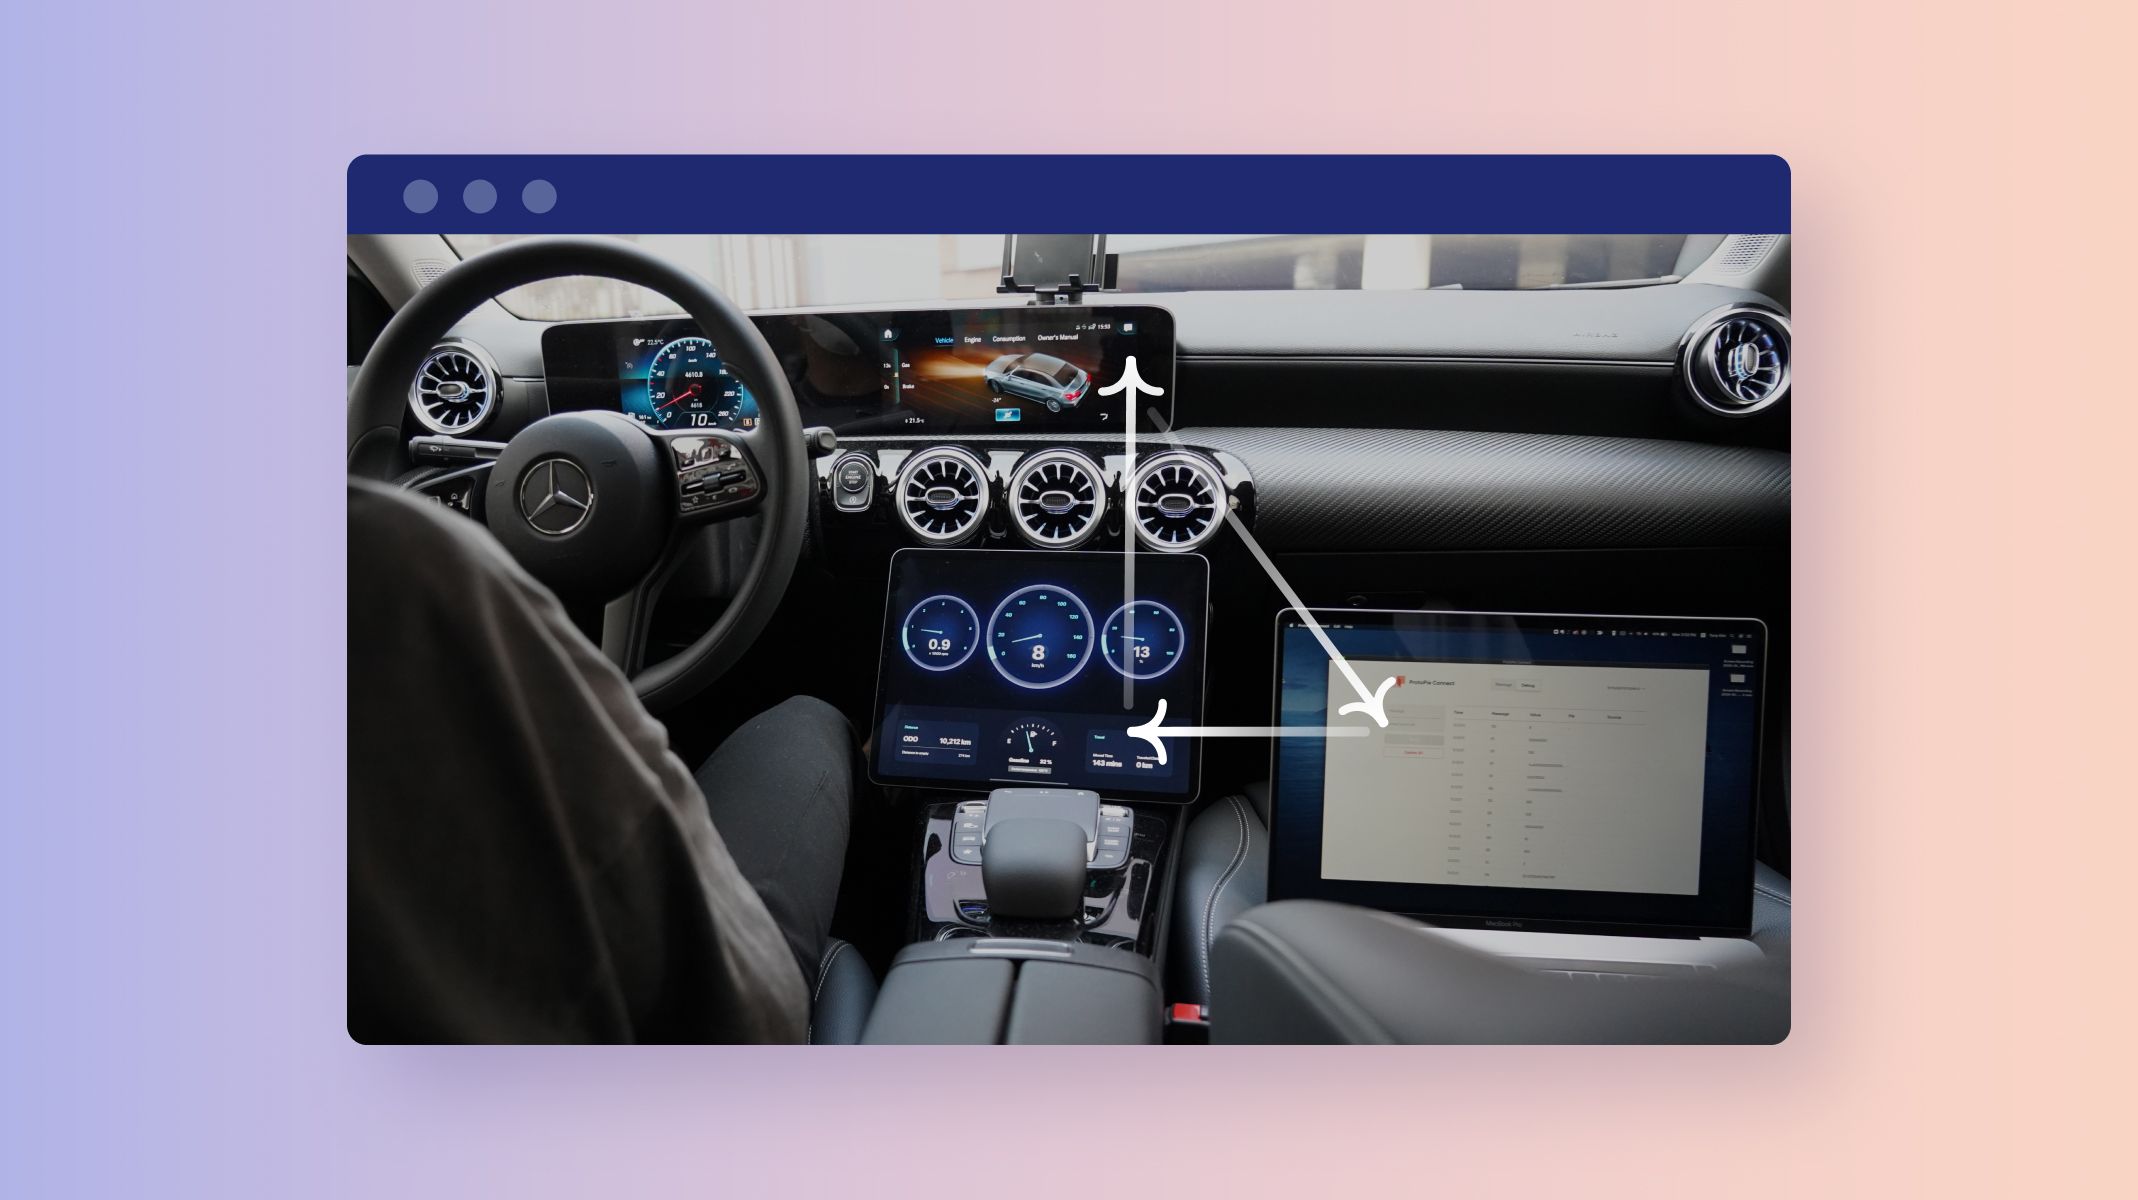
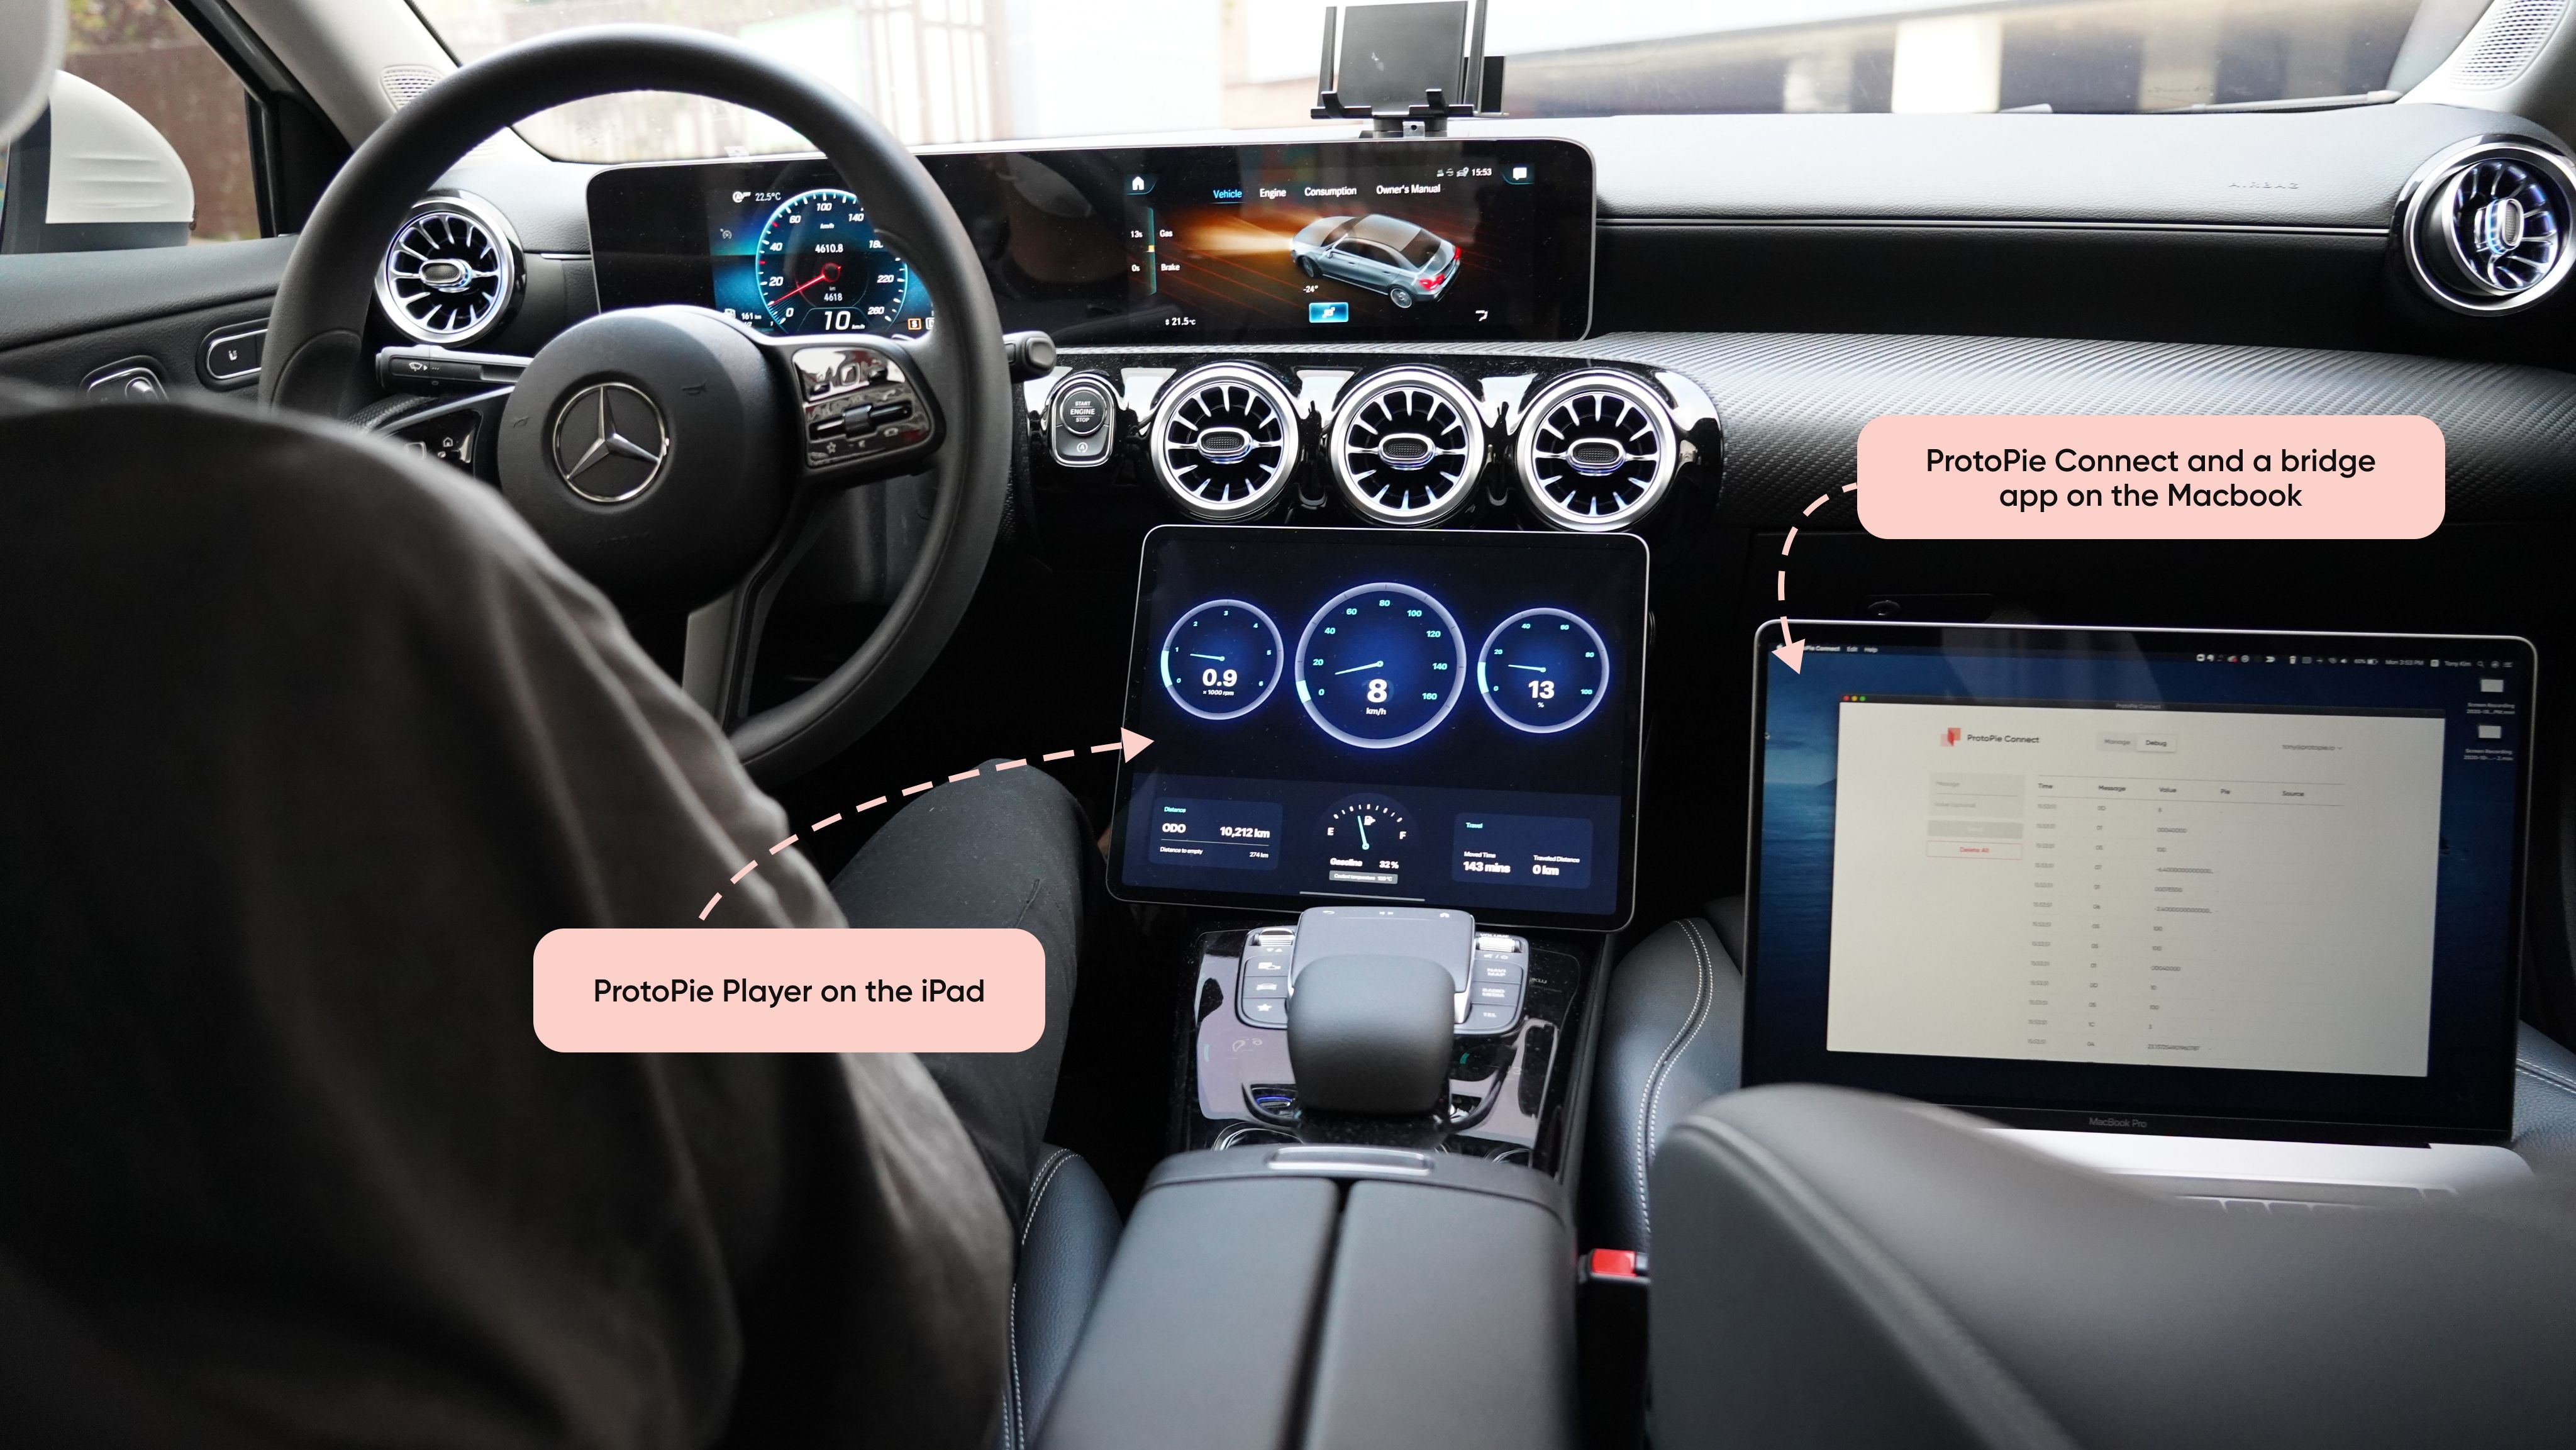
To test this data on your own designs, you will first need ProtoPie Connect and a Bridge App to connect the design or prototype with the OBD2 scanner. ProtoPie Connect connects your prototype (in this case, the dashboard on the iPad) with the OBD2 scanner. But to communicate with ProtoPie Connect, you need to support Socket.IO—this is where the Bridge app comes in.
Hit this link to check out the Bridge app that I specifically created for the OBD2 scanner. You can also alter the code of the Bridge app yourself to make it work for whatever piece of hardware you’d like to connect with. The diagram below shows how this process works.
The overall four-step flow, including the car and OBD scanner, therefore looks as follows:
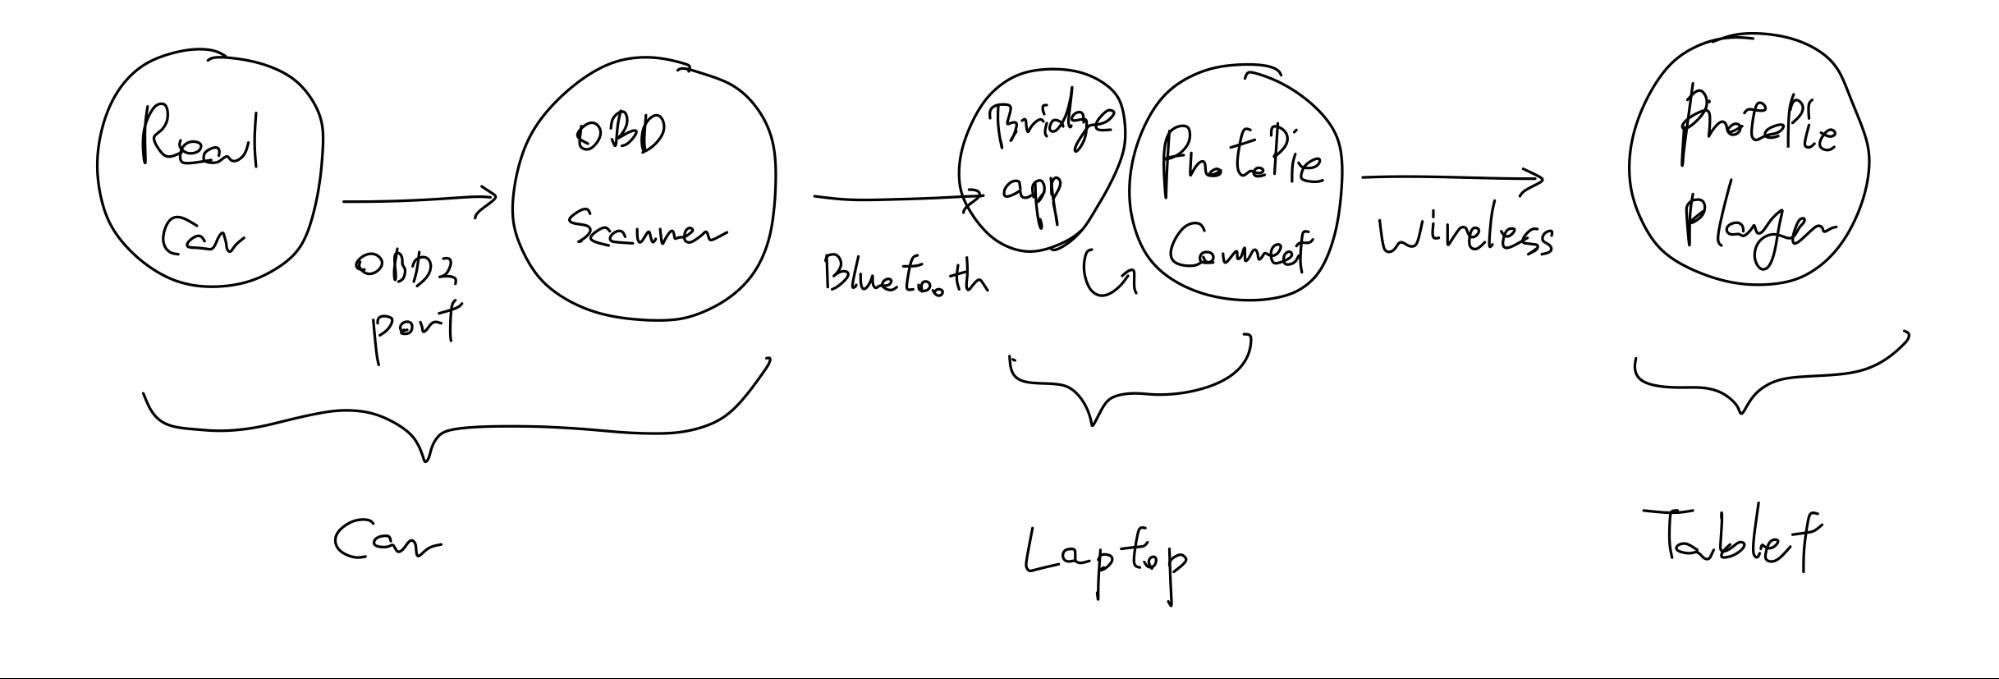
1. The car sends a variety of signals to the OBD scanner through the OBD2 port.
2. The OBD scanner delivers these signals to the laptop that’s running ProtoPie Connect.
3. You then need a Bridge App to interpret the OBD signals and make sure that ProtoPie Connect understands them.
4. ProtoPie Player is paired with the laptop via a wireless connection. In this demo, I tethered my iPhone to connect a MacBook (ProtoPie Connect) to an iPad (ProtoPie Player).
How was the prototype created?
Now that we’ve covered some basics regarding the overall setup, let’s dive into the details of the prototype itself.
Put simply, I wanted to create a gauge needle that would rotate according to the vehicle’s speed.
When the car is being driven, it sends through a series of continuously changing numbers from 0 to 255 (though you might get higher values with supercars) via an OBD2 port. The Bridge App then interprets these signals so that ProtoPie Connect can understand them before broadcasting them over to ProtoPie Player.
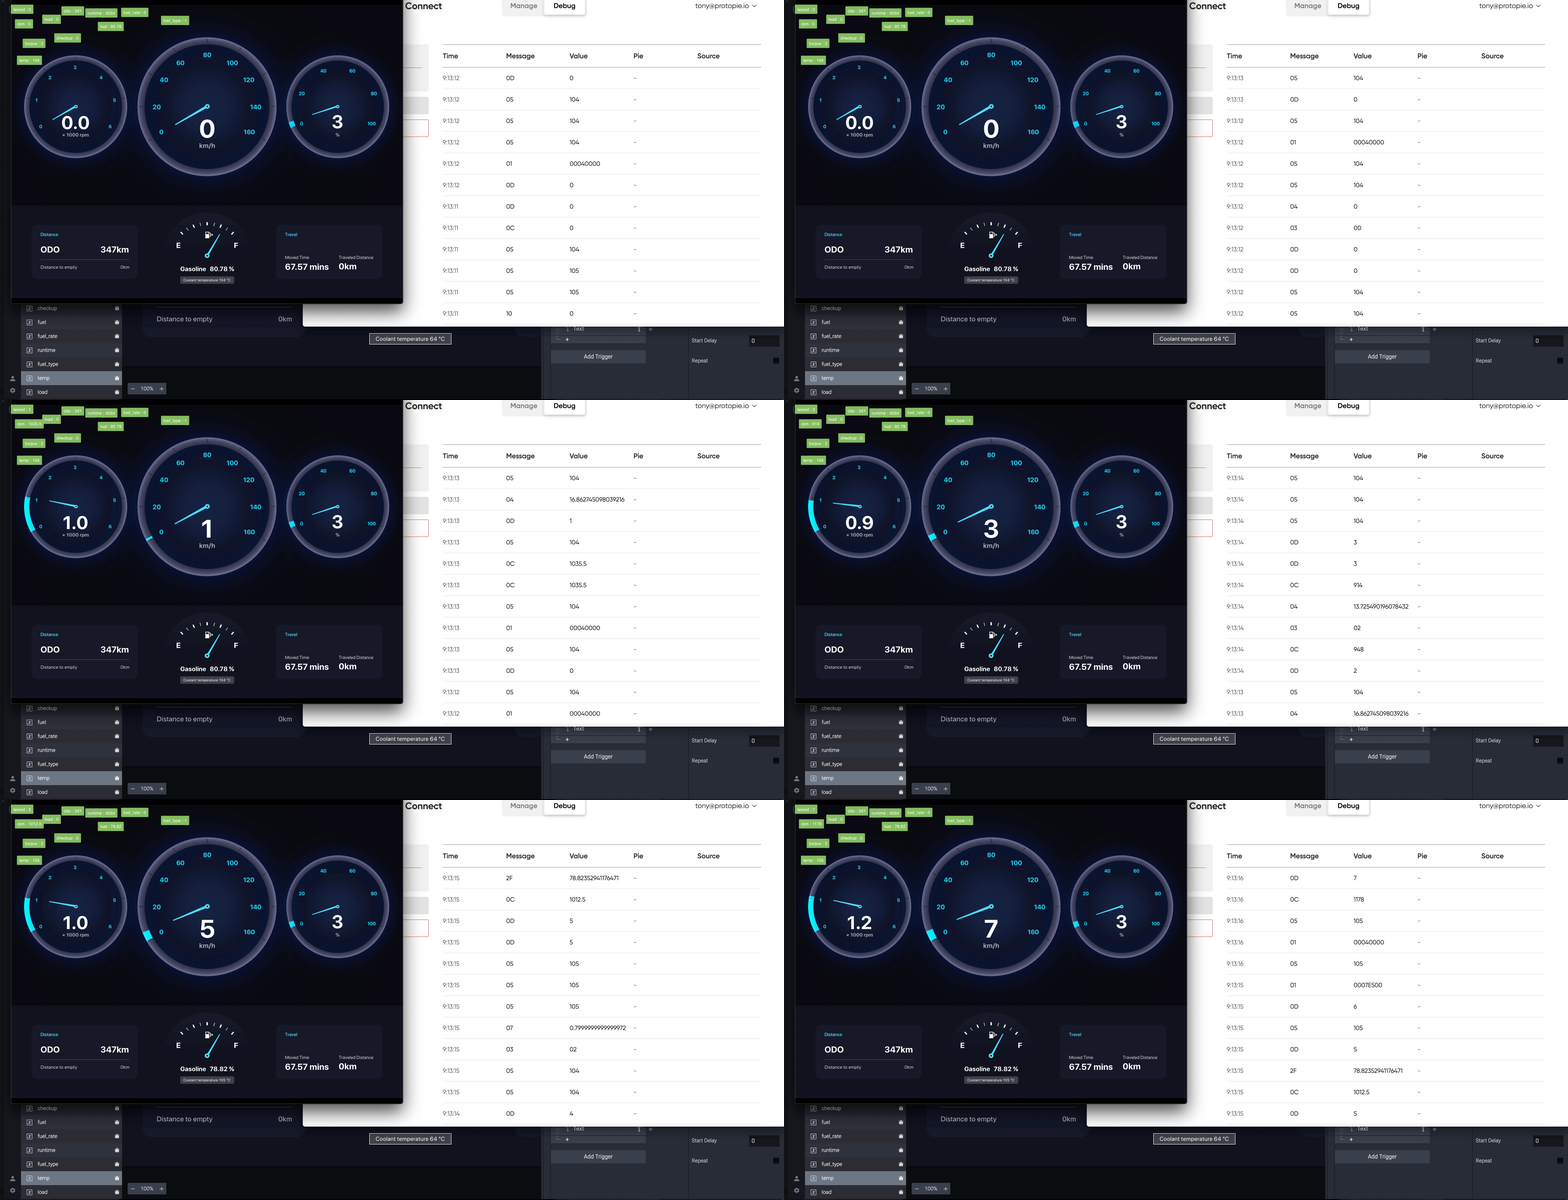
As you can see above, ProtoPie Connect is receiving a message named “OD” with values from 0 to 255. The Bridge App is able to interpret XX signals picked from the OBD table, and you can edit the app to get more signals if needed. Great! Now, let’s make sure that the Pie file (prototype) can understand these signals so that it can utilize them in interactions.
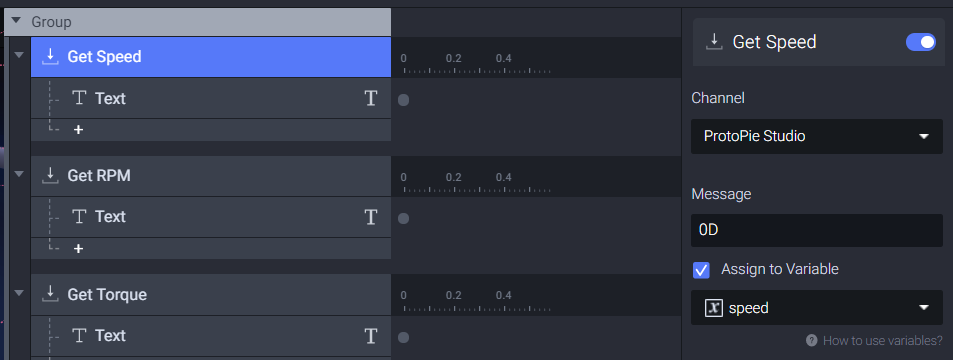
After adding a Receive Trigger, you then need to enter “OD” in the Message field and check the “Assign to Variable” option. Select a variable that you’ve previously made to assign the values.
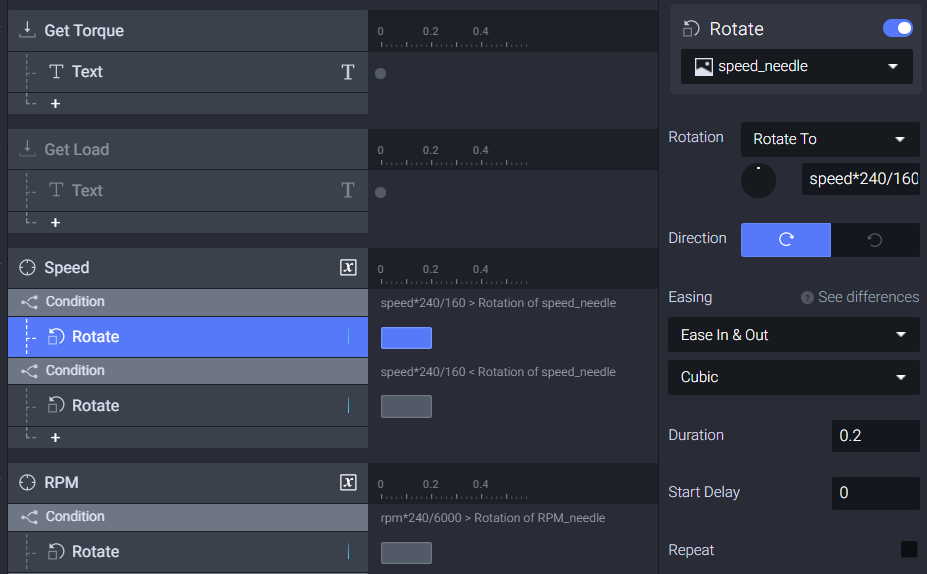
Finally, use the variable for the “Rotate To” option under the Rotate Response section to rotate the gauge needle. You’re now all set! In this prototype, the signals flow in one direction from the real car to ProtoPie Player.
Access Tony's Prototype and try it for yourself.
Making a prototype for a continuous or a vice-versa dynamic environment
Unsure about how to send dynamic values? Don’t worry—let’s delve into how you can make interactions involving multiple devices using the Bridge feature.
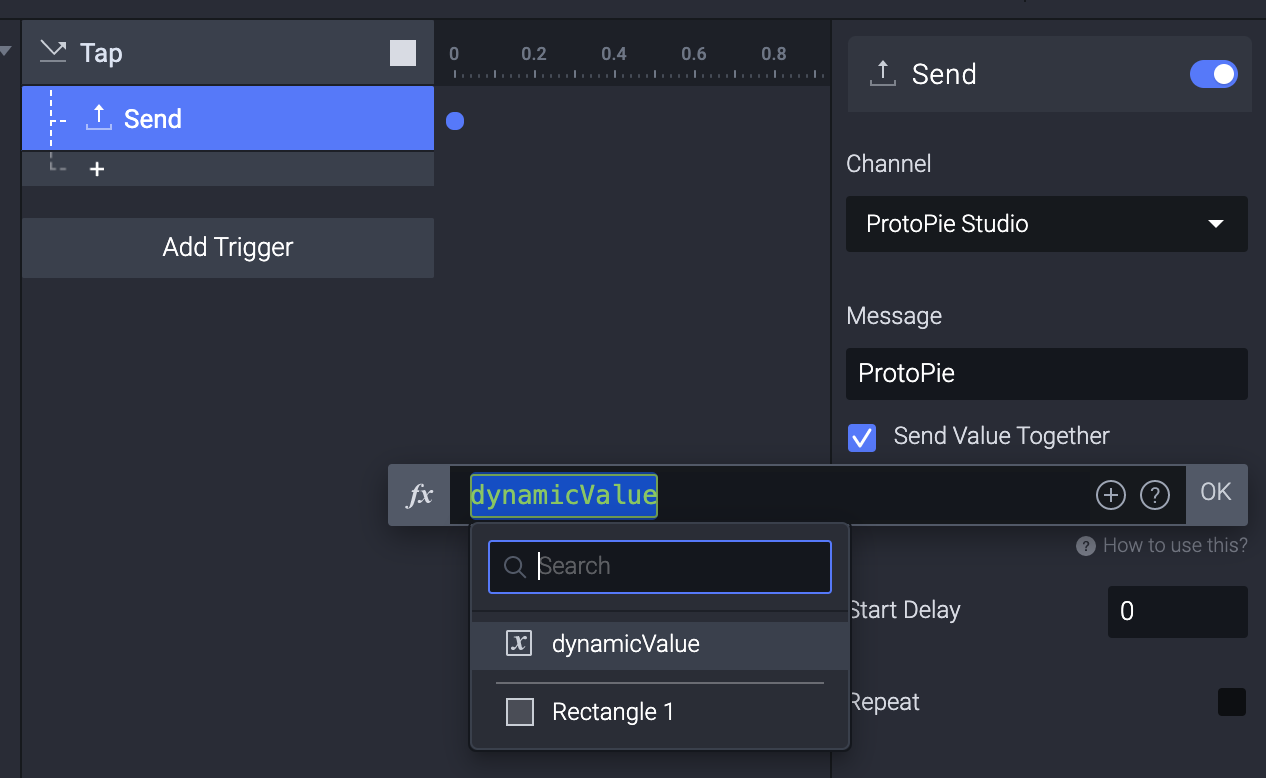
It’s actually pretty simple. The Send response and Receive trigger can communicate with each other by sending and receiving messages. If you want to send dynamic values, you can therefore check the “Send Value Together” option.
That’s it!
The future of automotive prototyping
It’s crucial that automotive designers can test their designs using real vehicle data. With ProtoPie, this process has been simplified and made accessible. It allows you to test your designs by integrating them with the actual vehicle—meaning prototyping with in-vehicle data from CAN/LIN bus or OBD directly. Now, you can experience more extensive automotive prototyping capabilities utilizing dashboards, lights, speakers, displays, and more.
If you’re interested in our Automotive Solution or would like to schedule a demo session, don’t hesitate to contact us.
